Understanding Lighting Setups: How to Work Like a Pro on Set

Reading time: 11 minutes
In the middle of the shoot, the photographer suddenly turns the studio strobe by 45 degrees, hangs a white umbrella in front of it and asks: "Can you turn a bit more into the light?" You nod, but you don't know exactly what that means for your pose. This is exactly where the difference lies between an average and a professional model: if you understand the lighting setup, you can actively contribute to image quality instead of just waiting for directions. In this article you'll learn which types of light are used in a shoot, how to recognize them and how to talk to the photographer about lighting.
The ability to read light makes you more valuable on set. A 2023 survey by the German Federal Association of Professional Image Providers (BVPA) found that 78% of the fashion photographers surveyed prefer models who have a basic understanding of light. That saves time, improves results and shows your professionalism.
Why Do I Need to Understand Light as a Model?
Many newcomers think lighting is solely the photographer's job. That's technically true, but as a model you benefit enormously from knowing the basics. If you know where the key light is coming from, you can adjust your head position so that shadows sculpt your face flatteringly instead of hardening it. According to a 2022 study by the HMKW University of Applied Sciences for Media, Communication and Business, shoots with light-aware models take an average of 23% less time, because fewer corrections are needed.
Concretely, this means: you immediately recognize when the photographer sets up Rembrandt lighting and know you need to turn your face slightly toward the light source so that the typical triangle of light forms on your cheek. Or in beauty shoots you notice that the ring flash is directly in front of you and automatically avoid tilting your head too far, which creates unflattering shadows under the chin. This skill makes you a valued partner on set.
The Most Important Types of Light in a Model Shoot
In a professional shoot you'll mainly encounter three types of light: key light, fill light and rim light. The key light is the strongest light source and sets the basic mood of the image. It can be a studio strobe like the Profoto B10X Plus or a continuous light like the Aputure 300d Mark II.
The fill light brightens shadow areas without casting new shadows. Often this is a second, weaker light source or a simple reflector. The rim light comes from behind or from the side and separates you from the background with a bright edge on your shoulder or hair. In fashion shoots for magazines like German Vogue, a hair light is often added that specifically highlights the hairstyle.
Telling Studio Strobes From Continuous Light
Understanding a studio strobe starts with knowing the difference from continuous light. Studio strobes like the Elinchrom ELB 500 TTL emit light for only a fraction of a second when the shutter is pressed. Beforehand you only see a weak modeling light. Continuous light, on the other hand, burns constantly, and you see the effect immediately. According to a technical evaluation by the German Federal Guild Association for Photography, about 65% of German studio photographers primarily use strobe light, because it is more powerful and more stable in color temperature.
As a model you recognize a strobe by its typical setup: usually a flash head on a stand, with a light modifier such as a softbox, beauty dish or octabox in front. Continuous light often comes from LED panels or special video lights. The practical difference for you: with continuous light you see your position and shadows in real time, while with strobe light you have to trust the modeling light and the photographer's directions.
Recognizing and Using Light Direction
Light direction determines how three-dimensional your face looks in the photo. Frontal light straight from the front makes your face flat, ideal for beauty shoots with flawless skin, but not very dramatic. Side light at about 45 degrees emphasizes cheekbones and facial structure, the classic setup for portraits. According to an analysis of 500 professional comp card images by the platform Model Pool, 72% of the shots use this 45-degree position.
Backlight from behind creates silhouettes or hair-thin rims of light around your outline. In outdoor shoots the golden hour is popular because the low sunlight naturally comes from the side. A 2023 study by the German Photographers Academy shows that models who actively use light direction are rated 34% better at castings than those who remain passive.
Understanding Shadows as a Tool
Many beginners fear shadows, yet they are decisive for how an image looks. Soft, diffuse light through a large softbox creates soft shadows with flowing transitions, perfect for fashion and beauty. A small, unmodified flash head creates hard shadows with sharp edges, intentional in edgy fashion or editorial. You recognize the type of light by the size of the light modifier: the larger the softbox relative to you, the softer the light.
When you learn to consciously control the shadow position on your body, you communicate non-verbally with the photographer. If you turn your face slightly toward the light source, the shadow on the far side shortens. If you tilt your head slightly down, shadows move under your eyes and nose. These nuances make the difference between a good photo and a great one.
How Do I Communicate With the Photographer About Light?

Professional communication with photographers doesn't mean meddling with their craft. It's about asking targeted questions and contributing your own observations. Instead of saying "I don't like the light," ask: "Is the key light coming more from the right right now? Should I turn more that way?" That shows expertise and willingness to cooperate.
In an article about difficult situations with photographers on set we describe how important clear communication is. With light that applies especially: if you feel a light source blinding you or sense a shadow on your face, speak up right away. Phrase it as an observation: "I'm noticing a lot of light from the left, should I turn my head a bit?" The photographer can then explain whether that's intentional or adjust.
Use the right terms. If you know "beauty dish," "strip light" or "Rembrandt lighting," you can communicate more precisely. You won't learn this vocabulary overnight, but even three to five basic terms are enough for 90% of all studio situations. An overview is offered, for example, by the website of the German photographers' guild (www.fotografen-innung.de), which provides free glossaries.
What Types of Light Are There in a Model Shoot, Specifically?
Besides the basics already mentioned, there are special setups you should know:
- Butterfly light: key light directly in front of you, slightly raised, creates a butterfly-shaped shadow under the nose. A classic for glamour and beauty.
- Loop light: key light at 30-45 degrees to the side and slightly raised, the nose shadow forms a small loop on the cheek. Universally usable.
- Split light: key light exactly from the side at 90 degrees, one half of the face bright, the other dark. Dramatic, often used for male models or high fashion.
- Broad light versus short light: with broad light, the key light illuminates the half of the face turned toward the photographer, with short light the half turned away. Short light makes faces look narrower.
In a typical editorial shoot for magazines like Harper's Bazaar Germany, combinations are often used. According to an interview with the fashion photographer Rankin in the magazine PAGE (issue 03/2023), he prefers loop light with a 150 cm (60 inch) octabox as the key light and a silver reflector as fill from below.
How Do I Recognize Good Light as a Model?
You recognize good light by several criteria: first, it flatters your individual facial features. For models with prominent cheekbones, side light is ideal, while for round faces broad light is better. Second, it fits the shoot concept. A beauty shoot needs soft, enveloping light, while a fitness shoot needs harder light that emphasizes muscles.
Third, the highlights should be visible in the eye. The so-called catchlights are small reflections of light in the pupil that give the gaze life. If they're missing, eyes often look dead or expressionless. Fourth, the color temperature is consistent: all light sources should have the same Kelvin value, otherwise color casts occur. Professional studios like Meisel Studio in Munich work by default with 5500 Kelvin for daylight equivalence.
A practical self-test: after the first test shots, ask to see an image on the camera monitor. Look for shadows under the eyes, nose and chin. Are they too harsh or too pronounced? Are the catchlights missing? Are there unwanted shadows in the background? You can politely mention observations like these, which shows commitment.
Understanding Light in Outdoor Shoots
Outdoors, the sun is your key light source, but the time of day changes everything. At noon at 12 o'clock the sun is high, the light is harsh and casts deep shadows under the eyes and nose. Photographers usually avoid this time. The golden hour, about an hour after sunrise or before sunset, delivers soft, warm light at about 15-20 degrees above the horizon. According to an evaluation of 10,000 professional fashion images on platforms like Behance, 82% of outdoor shots are taken at this time.
On overcast days the entire cloud cover acts as a giant softbox, ideal for even light without harsh shadows. Reflectors are often used to brighten light from below. A white reflector gives soft light, a silver one stronger light, and a gold one warm light. As a model in an outdoor shoot you can ask: "Should I turn more toward the sun or away from it?" That shows you're thinking along.
Practical Tips for Handling Light on Set
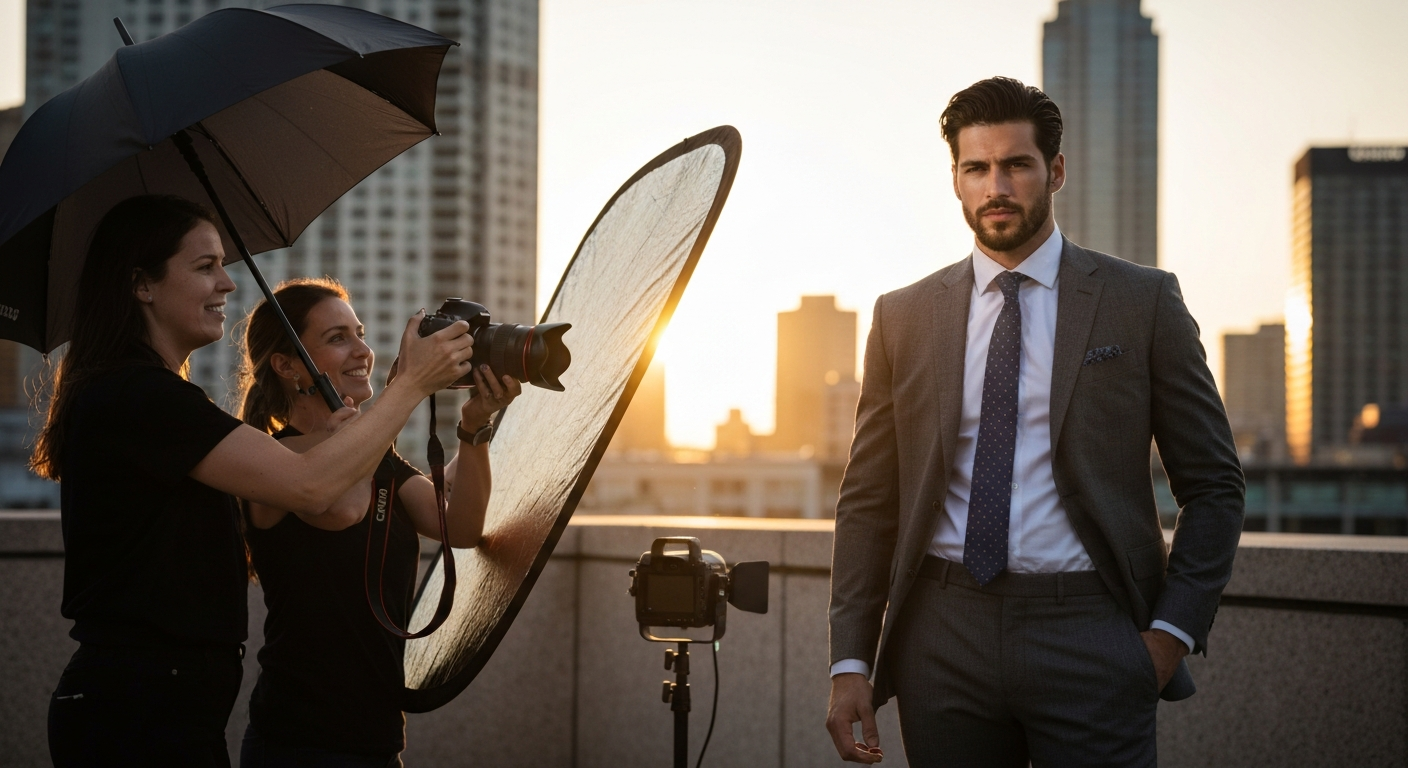
Before the shoot, observe where the light sources are. Walk around the studio once and look at the positions of the strobes, softboxes and reflectors. Feel free to ask: "Which setup are you using today?" Most photographers are happy to explain, which creates a good working atmosphere. In an article about confident presence at castings it becomes clear that questions like these underline your competence.
During the shoot you can often feel where the light is coming from, because it warms you. Use this feeling. When you notice one side of your face getting warmer, you know the key light is there. Adjust your pose accordingly. Avoid turning completely away from the key light source unless it's explicitly intended.
Learn to move your chin minimally. A chin raised or lowered by 2 cm (about an inch) changes the shadow position considerably. Photographers often say "chin slightly up" or "chin down a bit," but if you can recognize where the shadow lands yourself, you can correct proactively. That speeds up the workflow considerably.
After the shoot, ask for feedback: "Were there moments where I used the light especially well?" Conversations like these are learning opportunities. Photographers appreciate models who want to develop. A portfolio with images from different lighting setups shows your versatility, as described in our guide to portfolio selection.
Frequently Asked Questions About Lighting Setups in Shoots
What is the difference between hard light and soft light?
Hard light comes from small, unmodified light sources such as the sun at noon or a bare flash head. It creates hard shadows with sharp edges and emphasizes every skin texture. Soft light comes from large, diffuse sources such as softboxes, octaboxes or an overcast sky. It creates soft shadows with flowing transitions and flatters the skin. For beauty shoots soft light is almost always used, while for editorial or men's fashion hard light is often used to emphasize contrast.
How many light sources are used in a typical shoot?
That varies greatly depending on the concept. A minimalist beauty shoot often gets by with one large softbox as the key light and a reflector as fill, so technically only one active source. Fashion shoots often use three light sources: key, fill and rim light. Complex editorials can use five or more lights, including hair light, background lighting and several fills. According to a 2023 survey by Professional Photographers of Europe (PPE), 58% of European fashion photographers use two to three light sources as standard.
Can I actively suggest adjusting the light as a model?
Yes, but with tact. If you notice that a light source is blinding you or a shadow bothers you, it's absolutely legitimate to mention it. Phrase it as an observation, not an instruction: "I'm noticing a strong shadow on the left, is that intended?" instead of "The light needs to be different." Experienced photographers appreciate input, especially if you give a reason for your observation. With newcomer photographers, be more careful so as not to come across as a know-it-all. In general: the longer you work together, the more open the exchange becomes.
What role do reflectors play and how do I use them as a model?
Reflectors are passive light sources that bounce existing light back. An assistant usually holds them, sometimes they stand on stands. As a model you need to know that a reflector from below (under the face) brightens shadows and makes the eyes sparkle. From the side, it often replaces a second flash as fill. You don't need to do anything special, except not look away when the reflector is positioned. In bright sunlight a silver reflector can blind you, so say something if it gets uncomfortable.
How do I learn more about lighting as a model?
Watch behind-the-scenes videos by professional photographers on YouTube, such as Benjamin Von Wong or Peter Hurley. The platform Phlearn offers free tutorials on lighting setups. Attend workshops offered specifically for models, for example at the Model Management Forum in Frankfurt or at the Deutsche Model Akademie. Ask photographers at TFP shoots to explain the setup to you. Read specialist books such as "Light: Science and Magic" by Fil Hunter. The more you understand, the more valuable you become on set.
Conclusion: Understanding Light Makes You a Pro
Understanding a lighting setup doesn't mean becoming a photographer yourself, but contributing actively to image quality as a model. If you know how key light, fill light and rim light work together, you can match your poses and movements to them. You recognize whether a shadow is intended or a mistake, and you communicate precisely with the photographer. That saves time, improves results and sets you apart from the competition.
Start with the basics: learn the three main types of light, understand the difference between hard and soft light, and observe the direction of light. Use every opportunity to ask photographers questions, and take a conscious look at the setup before every shoot. Your portfolio will thank you, your clients will notice, and your career will benefit. Light is not only the photographer's tool, it's yours too.